If tutorials available on this website are helpful for you, please whitelist this website in your ad blocker😭 or Donate to help us ❤️ pay for the web hosting to keep the website running.
Laravel 8 File Upload
इस topic में आप सीखेंगे कि laravel 8 में file को कैसे upload करते हैं। तो सबसे पहले एक fresh laravel project install करते हैं।
composer create-project --prefer-dist laravel/laravel laravel8test
ये command run करते ही laravel 8 project install हो जायगा अब , हमें file को access करने के लिए link बनानी होगी।
local storage , मतलब अपने project में ही upload कर सकते हैं।
local storage , मतलब अपने project में ही upload कर सकते हैं।
external storage जैसे AWS.
by default , जब आप file को access करेंगे तो , वह public/storage folder को locate करता है , जबकि हम अपनी files को storage/app/public के अंदर रखते हैं। storage/app/public folder से files को access करने के लिए हमें एक symbolink link बनानी बढ़ती है। link बनाने के लिए simply run करें।
php artisan storage:link
ये command public/storage से storage/app/public link create कर देगी , जिससे आप file को access कर सकें। file upload करने के लिए storage का use करते हैं , example में हमें public storage का use किया है। अगर आप disk configuration करना चाहते हैं तो config/filesystem.php open करके देखे सकते हैं।
<?php

return [

    /*
    |--------------------------------------------------------------------------
    | Default Filesystem Disk
    |--------------------------------------------------------------------------
    |
    | Here you may specify the default filesystem disk that should be used
    | by the framework. The "local" disk, as well as a variety of cloud
    | based disks are available to your application. Just store away!
    |
    */

    'default' => env('FILESYSTEM_DRIVER', 'local'),

    /*
    |--------------------------------------------------------------------------
    | Filesystem Disks
    |--------------------------------------------------------------------------
    |
    | Here you may configure as many filesystem "disks" as you wish, and you
    | may even configure multiple disks of the same driver. Defaults have
    | been setup for each driver as an example of the required options.
    |
    | Supported Drivers: "local", "ftp", "sftp", "s3"
    |
    */

    'disks' => [

        'local' => [
            'driver' => 'local',
            'root' => storage_path('app'),
        ],

        'public' => [
            'driver' => 'local',
            'root' => storage_path('app/public'),
            'url' => env('APP_URL').'/storage',
            'visibility' => 'public',
        ],

        's3' => [
            'driver' => 's3',
            'key' => env('AWS_ACCESS_KEY_ID'),
            'secret' => env('AWS_SECRET_ACCESS_KEY'),
            'region' => env('AWS_DEFAULT_REGION'),
            'bucket' => env('AWS_BUCKET'),
            'url' => env('AWS_URL'),
            'endpoint' => env('AWS_ENDPOINT'),
            'use_path_style_endpoint' => env('AWS_USE_PATH_STYLE_ENDPOINT', false),
        ],

    ],

    /*
    |--------------------------------------------------------------------------
    | Symbolic Links
    |--------------------------------------------------------------------------
    |
    | Here you may configure the symbolic links that will be created when the
    | `storage:link` Artisan command is executed. The array keys should be
    | the locations of the links and the values should be their targets.
    |
    */

    'links' => [
        public_path('storage') => storage_path('app/public'),
    ],

];अब routes/web.php में routes add करते हैं।
// Routes to upload file
Route::get('upload-file', function () {
    return view('upload-file');
});

Route::post('upload-file', [App\Http\Controllers\FileController::class, 'upload_file'])->name('upload-file');इसके बाद resources/views folder में upload-file.blade.php name की file बनाएं और ये content रख दें।
<!DOCTYPE html>
<html lang="{{ str_replace('_', '-', app()->getLocale()) }}">
<head>
<meta charset="utf-8">
<meta name="viewport" content="width=device-width, initial-scale=1">
<title>Laravel</title>
</head>
<body>
@if(session('success'))
<p>{{session('success')}}</p>
@endif
<form method="post" action="{{route("upload-file")}}" enctype="multipart/form-data">
@csrf
<p>Select File : <input type="file" name="myfile"></p>
<button type="submit">Upload</button>
</form>
</body>
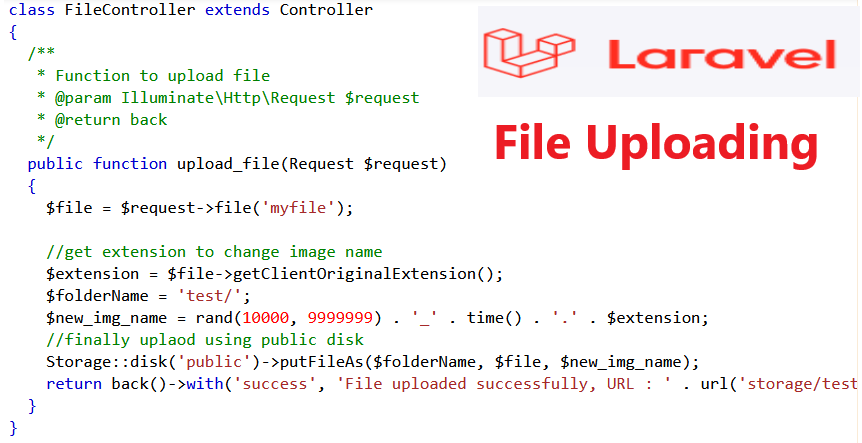
</html>अब एक FileControlller बनाते हैं , जिसमे upload_file() method में public disk का use करके file को upload करेंगे।
<?php
namespace App\Http\Controllers;
use Illuminate\Http\Request;
use Illuminate\Support\Facades\Storage;
class FileController extends Controller
{
/**
* Function to upload file
* @param Illuminate\Http\Request $request
* @return back
*/
public function upload_file(Request $request)
{
$file = $request->file('myfile');
//get extension to change image name
$extension = $file->getClientOriginalExtension();
$folderName = 'test/';
$new_img_name = rand(10000, 9999999) . '_' . time() . '.' . $extension;
//finally uplaod using public disk
Storage::disk('public')->putFileAs($folderName, $file, $new_img_name);
return back()->with('success', 'File uploaded successfully, URL : ' . url('storage/test/' . $new_img_name));
}
}
इसके बाद php artisan migrate command run करें और http://127.0.0.1:8000/upload-file URL को locate करें।
I Hope, आपको Laravel में File uploading example समझ में आया होगा।
Loading ...